
Note to readers: this is the first post in a series about creating and launching your first online course.
Are you frustrated or stalled in your course building efforts?
Get this:
A recent survey found that more than 50% of entrepreneurs, coaches, and freelancers are interested in creating an online course.
Far fewer (around 20%) are currently creating a course. And, only 14.6% have actually finished creating one or more courses.
With all that interest around their creation, why aren’t more people finishing and selling their courses?
Because…
It turns out there are quite a few challenges along the path to course creation, and most people who are just getting started get hung up on one or more of these challenges as they begin the process.
Unfortunately, this also starts to explain why only a small percentage of those interested in creating a course are actually doing so.
The good news for you is that not only does Ruzuku offer an awesome course platform, but we’re also here to help make sure you don’t become one of those statistics — we want your online course to succeed, not become one of the courses that dies a quiet death inside the mind of its creator.
So let’s get you into that 14.6% who have a finished course (or more) out in the world.
Are you ready?
We are!
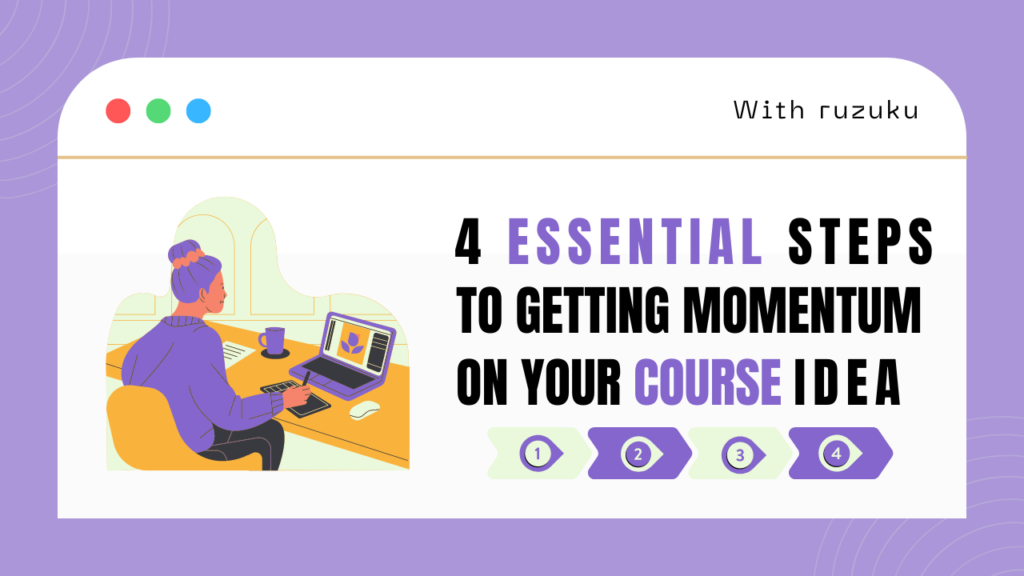
Position your course for success from the beginning
To create a course people love, the first (and most important) steps are to get really specific about who you serve, and also how you’ll help those people.
There are two reasons these steps are important: so that your course genuinely helps people, and so that it sells well.
The work starts in the planning stage, before you even begin writing your course. Let’s look at the four essential steps that will help you prepare.
Step 1: Attract the right people
Hopefully you already have a pretty good idea who you want to work with.
Whether it’s single moms who want to work from home to support their families, aging lawyers who want to lose weight so that they can keep up with their golf buddies, or newbie coaches who are looking to find their first client, you have a specific person in mind.
The word specific is important here — you want someone to be able to immediately identify themselves in your description. So no more “women between the ages of 25-55 who live in the greater Dallas-Fort Worth metro area and make between $30k and $75k per year,” okay?
Your goal should be to identify your audience by using words they’d describe themselves with. Being specific in this situation means your readers think, “Wow, they really get me!” or “Ooh! That’s me!!”
 You also want to consider who you don’t want to serve — in this video, Marie Forleo and Ramit Sethi talk about making sure your audience thinks “this is for ME.”
Getting crystal clear on who you want to serve with your course is incredibly important, and skipping this step can have disastrous results.
For example: hearing crickets when it’s time to sell your course.
Chirp.
Chirp.
Not good!
Don’t skip this step.
Instead, make sure you know exactly what problem you want to help your students solve.
Step 2: Tempt students with an irresistible result
For many people, the course creation process goes a little like this. The typical new instructor:
- Thinks, “I’d like to create a course about ___ …”
- Does zero research, and talks to zero people about whether they would be interested in the course.
- Spends countless hours creating a course about ___ .
- Opens the cart for their course.
- Ends up in tears because they only sold one or two spots in their course. And one of those people was their Aunt Betty… who signed up out of pity.
Do you see the problem here?
The thing is, no one cares what your course is “about” or what topics it covers.
What they do care about is how your course can help them achieve a desired result.
They have a problem, and they desperately want (or need) a solution. Your course could be exactly what they’ve been looking for. But in the example above, the creator never even considered students’ results.
Corbett Barr sums up the issue beautifully in this post at Fizzle: “businesses fail all the time because they try to solve a problem nobody really cares about.”
The danger of assuming
I can’t say this strongly enough: don’t guess what your audience wants to learn!
This step is where doing research and testing your ideas will become very important. As Jeff Goins and Pat Flynn discuss in an episode of the Portfolio Life, we set ourselves up for failure when we create in a vacuum.
Research is a big topic we can’t cover in detail in this post, but here are a few of the best places to start figuring out what your audience struggles with most:
- Comments on blogs related to your topic.
- Customer feedback on the top 10 Amazon books on your topic.
- Discussion threads on your topic in social media groups or pages.
- Conversations on forums or sites like Quora.
- Feedback from your own list (if you have one).
While you’re doing your research, it’s really helpful to write down (or track in a spreadsheet) the exact words and phrases that your audience is using to describe their problem. This “problem language” will be useful in several different ways as you go through your course creation journey.
Here are a few examples of problem language from different niches:
- Parenting: My kids are always cranky and exhausted. Yet every night is a struggle to get them to bed.
- Fitness: I try to set aside time to exercise, but unexpected demands keep popping up and throwing me off my schedule.
- Business: How do I hire help to grow my business when I’m just starting out?
As you’re gathering this problem language you can look for patterns, and then pick the one problem that jumps out at you as being both 1) important for the audience to solve, and 2) something you can actually help them solve.
If you’re stuck as to what your solution might be, you can think back on what your own experiences have taught you, the skills you’ve gained, and what you learned if you have overcome a similar challenge in your past.
But be sure to focus on just one thing — trying to solve multiple problems at once will divide your attention and keep you from providing an excellent solution to any of them.
For example, a writing teacher could teach students how to craft a good story line, as opposed to how to write an entire novel. Or, a marketing consultant might teach a client how to set up a simple website instead of focusing on the larger topic of building an online presence.
Think back to step one: who you serve. This is the one case where if you know for sure that there’s a problem you can solve, you can decide on the problem you’ll solve first, and the people you’ll solve it for second.
Otherwise, go back and repeat steps one and two until you’ve found a very clear “who” and “what” for your course.
Now you’ve got a solid direction. But what if it’s been done before? Should you keep searching until you’ve found a topic no one else is teaching?
Not at all!
Step 3: Embrace competition and stand out
If someone else has already created a course like the one you want to create, that’s actually good news! And if there are lots of courses on your topic, that’s even better.
Competition means there’s a market — and people are paying for the solution to this problem.
Differentiating yourself from the rest of the market will come into play in later stages as well, but for now Kelly Edmonds recommends setting yourself apart from the competition by finding your big idea.
She recommends asking the following questions:
- What makes your course super special compared to others?
- What is it about your topic that turns you on?
- How do you see it and feel about it?
- What can you offer that no one else can?
Remember that your audience isn’t just buying your course to get the information — in a sense, they’re buying you. They’re buying your experience and your presence as well as the way you present the material and help them achieve their goals.
As Sean Ogle shared in a recent post, “before people buy from you, they have to buy into you.”
And don’t worry about feeling like you’re “expert enough” — as long as you know more about the subject than your audience (and can deliver on the promise of your course), you know enough to guide them through the material.
Step 4: Entice students with an exciting vision
Now that we’ve figured out the who and what and know how your course will be different from the others out there, your next step is to identify one key result or learning outcome that your participants will get from your course.
Remember, you’re not creating a course “about” a topic — you’re creating a course to help your learners get a result.
This step involves digging deeper into what those results look and feel like.
You want to be able to see the desired results through the eyes of your participants. Remember when we suggested writing down the problems your audience is experiencing, in their own words (aka: gathering problem language)?
This is where that language becomes really important. It’s not what you hope someone will learn from your course — in the end, it’s what your participants actually say about the positive result they see and feel after completing your course.
 It’s about the testimonial someone writes you.
But (you might be thinking) hold on a second! Your audience hasn’t taken your course yet, so how do you know what they’ll say?
Here’s where we get to use a little bit of imagination.
You can create a brilliant course by envisioning your testimonials in advance.
Use the problem language research you did (so that you can describe the problem as your audience experiences it), and then create your fictitious testimonial around that language.
You’ll want your imaginary recommendation to be rich with details, and be sure to include lots of concrete examples of the benefits they got from your course.
This post from Copyblogger about the six questions to ask for powerful testimonials might be helpful as you try to imagine what your customer would say.
Your prep work is done. It’s time to get to the fun part!
Build your course the right way
You’ve gotten really clear on who you want to serve, what problem you want to help them solve, and the key result that your students are going to get.
Now you can finally put on your creative hat and start getting your course out of your head and into the world!
Craft a compelling course title
Coming up with a compelling course title can be nerve-wracking.
The title should be persuasive, inform your audience exactly what they’re getting, and hook them enough to make them look more closely at your offering.
That’s a lot of pressure on something shorter than the average sentence!
One way to make this process easier is to write down the top outcome or result people will get from your course.
The title should flow naturally from the actions people take in the course and how they feel as a result of the course.
Based on what you write down, try to draft up a few working titles. You don’t have to keep the title you come up with, but it will give you something to work with as you get started.
And, try to have some fun with it! People are more likely to sign up for a course they think that they’re going to enjoy.
As an added bonus for you, we pulled a handful of real course titles that some of our instructors came up with during our last 30 Day Course Creation Challenge. The first two courses are live, and the second two are still in “creation” phase.
- Find Your Flow: Tame The Chaos and Create A Rhythm For Your Whole Life
- Better, Happier Spindle Spinning
- Mything Out: An Intro to Geeking Out on Mythology
- BV Research: How to Perform Defensible Research and Protect Your Billable Time
Hopefully some of those titles have inspired you to get moving on your own outcome-based title!
Once your title’s in place, you can start brainstorming your course content.
Assemble your raw materials
Your next step is to gather all your ideas together in a rough outline.
Don’t worry about including all of your content in detail just yet – at this stage, you just need to outline how everything will fit together. You’re building the skeleton (structure) of your course before you fill it in with the rest of the body (lesson content).
Warning: whatever you do, DO NOT try to write your course by “winging it” or creating on the fly without an outline.
You’re going to cover a lot of material, and it will be next to impossible to keep it all straight in your head. Save yourself hours of rework and heartache. Outline right from the start.
It’s up to you how you want to outline:
- The old fashioned way, with pen and paper,
- In a digital document like Evernote or word processing software, or
- In a specialized outlining tool (Abe likes Workflowy and uses it all the time).
The most important part of the decision about how to outline is to choose the method that works for you!
Maybe right now you don’t know what works best, so just pick one and get started. You’ll figure it out as you go along.
Set your students up for success
Especially if this is your first course, it’s in your best interest (as well as your students’) to create only the minimal viable content that helps your participants move toward the #1 outcome of the course.
Think back to the result that you promised them, and only include the information that they absolutely need to get there.
 Anything else is just additional information that can distract them or trip them up along their path to success.
Breanne Dyck offers a series of questions you can ask yourself to figure out how long your course should be.
It may sound a little weird, but simpler is better when it comes to online courses. You can always include additional resources in a bonus course or an intermediate level course — after they successfully complete this course.
Additionally, when you keep your course creation simple you’ll be able to launch your course sooner and iterate based on actual customer feedback, instead of your imaginary testimonial.
Because, let’s be real — as cool as the made-up testimonial is, testimonials from actual customers are even better!
We’ve covered a lot so far. You’re almost done with your course planning.
Structure your course for results
It’s always good to start your course with a Welcome or Orientation module and end with a Conclusion or Next Steps module.
In between, you might have anywhere from one to five learning modules.
Each of the modules might be broken down into lessons. Now you can think about what the student will need to know in order to move from one lesson or step to the next.
Did you ever play the game of teaching someone how to make a peanut butter and jelly sandwich, where they had to follow your instructions exactly (and someone inevitably forgot to mention that you had to pick up the knife, or open the jar of peanut butter)?
Laying out your lesson plan is kind of like that game — you’ll want to anticipate how each step leads into the next.
Remember, keep each module as short and sweet as you can, and only include the steps that are absolutely necessary for your students to reach the #1 outcome.
A few things to remember
As you’re starting to think about your #1 outcome, it’s good to figure out what you want your students to do (and apply). List these steps out.
Ideally, you want them to take action on your course material, so that they can reach the point where they get the benefits.
So try to be as clear as you can as you’re describing the #1 outcome and the actions they need to take to get there, and be sure to stay focused on it as you create your outline.
Then decide how much that outcome is really worth to your students.
Price for the value you deliver
Before you start thinking about getting your first students in the door, you’ll want to decide whether you will charge for your course.
 Remember, your course is going to help people and deliver value. Almost certainly, you will want to charge for that value… someday. But maybe not right now.
Here’s a rule of thumb to help you decide if you should offer this course you’re working on right now as a free or as a paid program:
If you are just getting started with online courses and your goal is to “get your feet wet” and learn as much as possible by offering your first course, then we recommend offering your course for free.
It’s the simplest way to get started and minimizes the chance you’ll get stuck along the way.
But, if you have some experience with courses (or if your business is relatively mature and you’re confident about pricing), then you might consider offering your course at a special early adopter discount.
For example — if you ultimately hope to offer your course for around $500, consider offering it to a small pilot group at a discounted price… say, $197.
When you’ve made your decision, try to articulate why you made that choice, just to double check that you’re not choosing your pricing from a place of fear or a lack of confidence.
If you’re feeling shaky about charging, remember that it’s all about the value that you’re delivering to your students. They have a problem, and you’re offering to help them solve it — that’s valuable!
And if you’re still not sure, we recommend taking a listen to our podcast interview where Abe talks with Tom Buford about how to charge what you deserve.
So what’s next?
If you’ve followed along with this post and implemented everything we’ve suggested, congratulations! You’ve made great progress already.
The first thing we’re going to do in part 2 of this post is to start reaching out into your audience, to make sure that your course is something that people will “raise their hands” to take.
We’ll also cover the rest of your course creation steps – how to flesh out the skeleton of your course – and how to cross the finish line to a finished course and enrolled students.
So worry not — we’re not abandoning you with a half-finished course on your hands!
The next four weeks should be just enough time to put this post to good use.
Before you tackle the information in part 2 of this series, you should:
- Figure out your “who”,
- Know what problem you’re helping them solve, and
- Have the first draft of your course title and outline completed.
And, if you’re feeling super motivated to take an extra step, you can start to make a list of people you think might be a good fit for your course or who you imagine might be interested. Keep that handy for the next installment in this series.
The rest of this month, we’ll be digging a little deeper into the challenges around course creation, and also highlighting some current Ruzuku instructors who are doing great things with their courses.
So take a deep breath, and let’s get going — over the next 2 months, we’re going to get you into that 14.6% who have a finished course out in the world.
Maybe together we can even make that percentage grow!
What are your next steps? Have you done any of the work above yet? Have you gotten stuck somewhere? Or, how’s your online course coming? Let us know in the comments — we’re here to help!


14 Responses
Many thanks for sharing my blog post – I was nodding my head all the way through your article.
I hope we can spread the news enough so there are more success courses and not heart breaks :0)
Thanks for writing such shareable wisdom, Kelly! Glad that you enjoyed the post – and yes, let’s work on a world with more successful courses!
Jessica,
Fabulous post. I don’t know that I’m ready to take it on right now – just moved, have a number of other projects that come first – but I’m going to be bookmarking it and coming back when the time is right. Thank you for such a clear, actionable and motivating post.
I love it, Eve! It will be here waiting for you when you’re ready – let us know if there’s anything we can do to help you along the way. And good luck with finishing up the move, and your other projects!
Switched up my mindset today with a success – didn’t know I could be part of the top tier 14%. Thanks for helping me feel more positive.
That’s so awesome, Denise! Thanks so much for sharing your mindset switch – we love hearing about those!
Imagine meeting you here, Jessica! 😀
I’ve taken a couple of courses on Ruzuku and it’s my current platform. Just gotta get those courses done. I have so many ideas – truly – that I’m not sure yet where to start. But I’m getting closer. Launching a new blog. Woo hoo!
Small world! Awesome to hear that you’re currently using Ruzuku – good luck figuring out which idea to tackle first, and with the new blog. Very exciting!
Jessica, thank you so much for this informative series. I’ve taken a few courses on Ruzuku and I have enjoyed how easy they were to navigate. Now that I’m getting ready to launch to my own first e-course, I’ve been shopping around for the right platform. There are so many options all with their own pros and cons. However, I keep coming back to Ruzuku. It’s easy to navigate for both the instructor and students and it’s a great, clean looking site. But the biggest reason I’m sticking with Ruzuku is, hands-down, the helpful and super nice people behind the technology. Truly good vibes here! 🙂
Thanks so much, Iris! We love all of our instructors – it’s a little bit like family around here! Let us know how we can support you as you get that first course up and running.
Great article, Jessica. I absolutely loved this: ” no one cares what your course is “about” “! To take it even one step further, no one cares what you are going to talk about in your videos, either. What will the students be able to do differently as a result of the course? That is the bottom line.
So true, Eileen! “What will the students be able to do differently” – it’s all about their takeaways. Thanks for adding to the discussion!